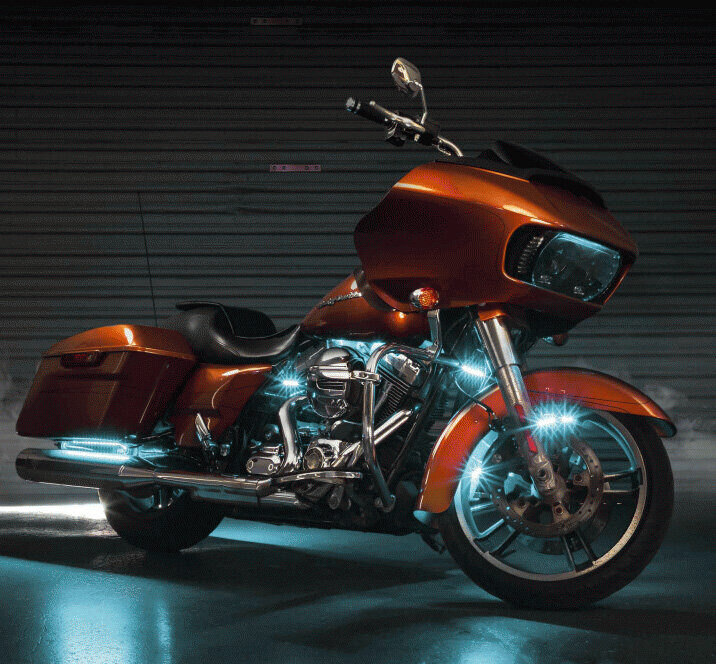
Installing a premium LED light kit on your Harley-Davidson FL Touring model is one of the best ways to enhance your bike’s style, visibility, and safety. Below we’ve provided resources and references to help you install the Saddle Tramp 16-piece chasing LED accent lighting kit, from our online parts store. This kit is specifically designed for Harley-Davidson FL Touring models from 1998-2022 and it’s over $200 off on our web store while supplies last!
 Key Features of the Saddle Tramp Plug and Play LED Light Kit
- Chasing LED Lighting: Includes programmable animations for a custom look.
- Smart Control: Operate the lights via the free Heise Connect app or the included RF card remote.
- Pre-Wired for Easy Installation: LED strips are pre-wired for various locations, including:
- Triple tree
- Front fender
- Down tubes
- Gas tank
- Back engine
- Lower frame
- Saddlebags
- Tour Pak
- Trigger Control: Features a pre-wired trigger for brake lights to enhance visibility.
- Additional Functions:
- Turn signals (left and right)
- Music sync
- 170+ color-changing patterns
- DIY custom pattern creation
- Brake light function
- Waterproof and Durable: Rated IP68 with water-tight, labeled connectors.
- Power and Safety:
- Addressable LED controller
- Max load: 10 A
Installation Resources
Step-by-Step Installation Overview
- Plan Your Layout:
- Before installation, identify where each pre-wired LED strip will be mounted.
- Ensure the bike is clean and dry in the areas where the strips will be applied.
- Connect the Controller:
- Mount the Heise Connect Chasing Controller in a secure location, away from heat or excessive vibration.
- Use the water-tight connectors to connect the controller to the pre-wired LED strips.
- Run the Wiring:
- Follow the labeled connectors to route wiring neatly along the bike frame.
- Use zip ties or adhesive clips to secure the wires and prevent them from interfering with moving parts.
- Connect Power:
- Wire the system to the battery or an auxiliary power source.
- Ensure proper grounding to avoid electrical issues.
- Test the System:
- Download the Heise Connect app and pair it with your controller.
- Test each function, including animations, turn signals, brake light trigger, and music sync.
- Secure and Finish:
- Once all functions are verified, secure the LED strips and wiring firmly.
- Replace any removed bike panels or covers.
Video Tutorial
For a visual guide, watch this helpful YouTube tutorial on installing an LED light kit on Harley-Davidson Touring models:
Harley-Davidson LED Light Kit Installation Tutorial
Need Wiring Diagrams? Contact Us!
If you need detailed wiring diagrams for your specific Harley-Davidson FL Touring model, call us at 843-910-8333. We’ll provide the diagrams free of charge to ensure a smooth installation process.
Tips for a Successful Installation
- Double-check Compatibility: Confirm your bike’s year and model match the kit specifications.
- Use Protective Gear: Wear gloves to avoid damaging the LED strips or connectors.
- Test Before Finalizing: Always test the lights and animations before securing everything permanently.
- Follow the Manual: Refer to the included installation manual for specific instructions.
Why Choose Our Saddle Tramp LED Light Kit?
This kit is built for performance, durability, and style. With its water-resistant design, app-controlled features, and variety of programmable patterns, it’s the perfect upgrade for any Harley-Davidson Touring model. Plus, we’re here to help with support and free wiring diagrams, ensuring your installation is hassle-free. Order it online at our web store – on sale now!
Don’t settle for ordinary—light up the road with this state-of-the-art LED light kit! If you have any questions or need assistance, don’t hesitate to reach out to us.


